Quantifying & Installation

How to quantify your project
When you contact Vinyl Cladding New Zealand for a quote, we will need measurements from you to provide you with an accurate price. You may already have plans available that you can send us to price from, but if you are re-cladding an existing property you may not have access to these.
If you’re handy with a tape measure, simply download and fill this measurement form in, and send it back to us for a free no obligation quote.
There’s also an online form you can fill out, available here. These are the most accurate way of quantifying what you will require.
How to quantify the amount of cladding you pay need for your home:
- MAKE A ROUGH SKETCH OF THE HOUSE
- TAKE MEASUREMENTS
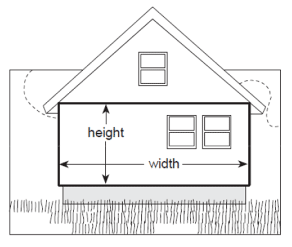
Measure the height (ground to top), and length (side to side) in metres. The area to be clad with Mitten can be determined by measuring the height and width of the house. Start by choosing one side of the house to be clad.
- MEASURE THE RECTANGULAR WALLS TO BE CLAD
Do not include gables – yet. Windows and doors are not usually deducted. Including them provides an allowance for wastage. If the windows and doors are large (garage doors, sliding doors etc), some deductions can be made but leave that part to us. Continue measuring and recording the remaining rectangular walls to be clad.
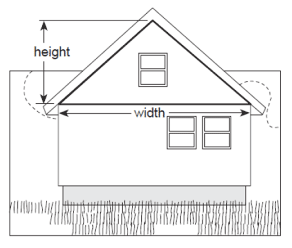
- MEASURE AND RECORD ALL GABLE WALLS AS TRIANGLES
Include base length, and a perpendicular distance from base to peak (height).
- FIND THE AREA OF A RECTANGULAR WALL BY MULTIPLYING THEIR LENGTH AND HEIGHT
The result is the area of the rectangle wall.
- FIND THE AREA OF A GABLE WALL BY MULTIPLYING BASE LENGTH BY THE HEIGHT AND DIVIDING BY TWO
- FIND THE TOTAL AREAS OF THE WALL BY ADDING YOUR GABLE AND RECTANGLE WALL AREA
Calculating Wall Area
Height (metres) x Width (metres)
= Surface area (metres)

Calculating Gable Area
Half height x Width = Gable area

How to quantify your trim
- STARTER STRIP
Measure the height (ground to top), and length (side to side) in metres. The area to be clad with Mitten can be determined by measuring the height and width of the house. Start by choosing one side of the house to be clad.
- J-TRIM
Measure the distance in metres around all windows and doors. This will be the amount of J-trim required. We like to add a few additional J-trims to allow for wastage.
- OUTSIDE CORNERS
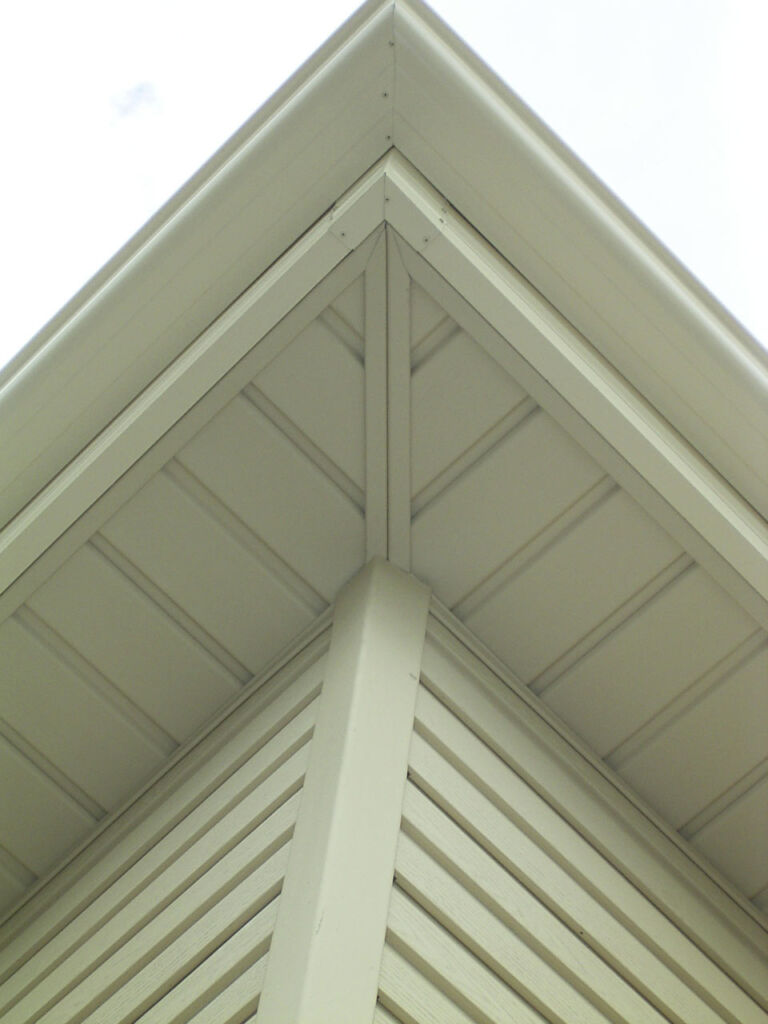
Measure the meterage of external corners. Rusticated & Bevelback Corner Posts come in 3.65m lengths. Sentry Corner Posts come in lengths of 3.05m. Corners can be lap joined if taller.
- INTERNAL CORNERS
Measure the meterage of internal corners. Rusticated and Bevelback Internal Corners come in 3.65m lengths. Corners can be lap joined if taller.
With the Sentry profile, J-Trim is used back-to-back on internal corners. Allow 2 J-trims per internal corner (more J-trim will be required if your internal corner is over 3.66m high).
- TOP OF WALL
J-Trim is also used for this. Measure in lineal metres right around soffit line.
Installation
We understand that the building process can be stressful (we’ve been there!). Not to worry, we’re here to make the cladding side of things as easy as possible for you.
We will assist you in choosing your cladding type, and deal with your chosen builder or home-build company. And then, we’ll deliver your cladding. Ready to be installed.
It really can be that simple.

- Any licensed building practitioner can install. No specialist installers required.
- Lightweight and safe to handle
- No specialist tools or equipment needed
- Very quick to install
- No prep, sanding, or painting - EVER
We are experts at what we do. We can provide you with advice on the uses and correct installation of all our weatherboards. It is a very easy cladding type to handle and install. Any licensed building practitioner can install it. It doesn’t need specialist installers. For this reason, we do not offer an installation service.
We can advise you on the appropriate profile for your particular job, best procedures, the best colours, and the best way to install. Don’t leave it to guess work and trial and error, let our experts help. We are only a phone-call or email away.
We are happy at any stage of your planning process to liaise with your builder to ensure they have all the information they need to do the job right. We will send them comprehensive installation instructions on confirmation of your job.
How to Install of Vinyl Cladding
Advances in Vinyl formulations have made today’s Vinyl products durable, low-maintenance, and lightweight, all which translate into reduced use (and potential waste) of other materials.
Quick Installation Guide
If you want to see exactly how it goes together, please see our Quick Installation Guide here.
Full Installation Specifications
We also have a full technical manual you can download here.
Our Services Include
- Measure and quote from plans or diagrams with fast turnaround time so you're not kept waiting.
- Supply of cladding materials and full installation instructions.
- Support for your chosen builder.
- Vinyl Cladding samples couriered to you if you want to see the cladding up close!
- A match up service for cladding repairs and renovations. We can identify product, source cladding materials and give good options.
- Provide comprehensive installation instructions plus important tips for achieving the best workmanship.
- CAD /Flashing details available on request.
Contact us at 0800 648836 or info@vinylcladding.co.nz for further information.


